Coffee Chocolate Chip Oatmeal Cookies

17 May

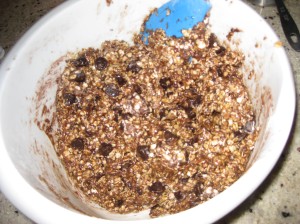
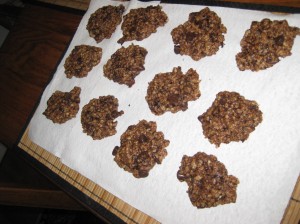
These cookies are the bomb. It’s like eating breakfast and dessert, at the same time. My little sister claims these are the best cookies I’ve ever made, which is rather remarkable considering the amount of cookie baking that goes on in this house. I got the recipe from the beloved and very trustworthy Vegan Cookies Invade Your Cookie Jar. These are great for just about any occasion, but today I made them to introduce my Sustainable Works crew to the magic of vegan cookies, which happen to be ethical, sustainable, and freaking delicious.

Ingredients:

1/2 cup soy milk (or any other nondairy milk)

1/2 cup canola oil

2 tbsp ground flax seeds (more on flax seeds later)

1/3 cup brown sugar

1/2 cup sugar

1 tsp vanilla extract

2/3 cup all-purpose flour

1/8 tsp ground cinnamon

2 tbsp instant coffee powder

1 tbsp cocoa powder

3/4 tsp baking powder

1/4 tsp salt

1 3/4 cups oats

3/4 cup chocolate chips

Preheat the oven to 350, set out your cookie sheet and line them with parchment paper (or use a silicone mat, which is awesome and reusable (see: sustainable), plus the cookies come off really easily).

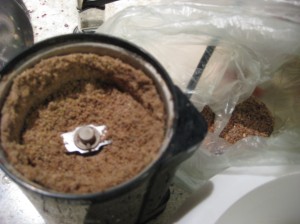
A moment on flax seeds. It took me forever to take the plunge and use flax seeds, and now I’m kind of embarrassed that I was so intimidated by them. They’re an egg replacement and work great in stretchy chewy things (like donuts!). You can even buy a box of ground seeds at Trader Joes. Flax seeds are full of great nutrients like dietary fiber and omega 3 fatty acid. It lowers cholesterol, and helps fight cancer and diabetes, so once you have it in the pantry feel free to use it in things other than baking (like smoothies or salad dressing). If you’re not ready to take the plunge into a whole bag of ground flax, get about a 1/4 cup from the bulk bins in seed form and grind it in a coffee grinder.

Mix soy milk, canola oil, ground flax seeds, brown sugar, white sugar, and vanilla extract. Sift in flour, cinnamon, coffee powder, cocoa powder, baking powder, and salt. Add oats and chocolate chips. Mix until all ingredients are moist.

Scoop heaping tablespoon on to your cookie sheet about an inch or two apart and smoosh down a little with the bottom of the spoon. Bake for 14 minutes. They’re done when the edges look dry and the middle’s a little puffed.


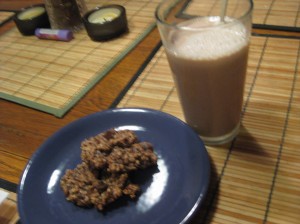
Awesome with a glass of chocolate soy milk, even better with your morning coffee.

Celestial Banana Bread

29 Apr

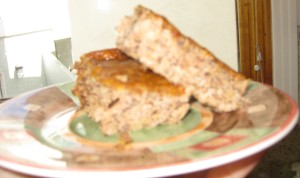
This is not hyperbole. I am certain that this banana bread was thought up by Zeus himself. It is other wordly, like you couldn’t believe. It’s incredibly simple, but would make anybody fall in love with you. Since acquiring this recipe I have been on the lookout for banana bread competitions, because I’m sure this could win me any number of awards. Sharing this recipe with the internet may be the single greatest thing for humankind that I will ever accomplish in my life. Here it goes.

I veganized this recipe from a book called something like Recipes from Viriginia, Georgia, and North Carolina, a bizarrely obscure cookbook of home recipes found at my second family’s home. Now, just incase the title didn’t make it clear, this is deep south baking, at its most unhealthy. That’s just the price you pay for delectable. It was super easy to veganize, I just swapped butter with Earth Balance and the egg with an extra banana. However, once I got home I decided to add an egg worth of egg replacer powder as well as cinnamon and vanilla extract.

Ingredients

3-4 very ripe bananas

1 egg worth of egg replacer powder (1 1/2 tsp powder + 2 tbsp water, whisked)

1/2 cup melted earth balance butter

1 cup sugar

1 tsp vanilla extract

1 1/2 cups flour

1 tsp salt

1 tsp baking soda

1 tsp cinnamon

We start with the bananas. I recently had a banana bread revelation. Not all bananas can make the long trip from South America and Southeast Asia in the pristine condition you see them in in the produce section, unfortunately some age more quickly than others and get beat up along the way, and these get hidden in the back of the grocery store as there is no convalescent home for bananas. Instead of planning your banana bread many days in advance and waiting in agony for your bananas to over ripen, at the grocery store find the produce manager and ask for the beat up and overripe bananas in the back, and she’ll find them and give them to you for a discount. Bingo! Now you can go straight home and get to banana bread making–what a great day!

Preheat to 350 degrees

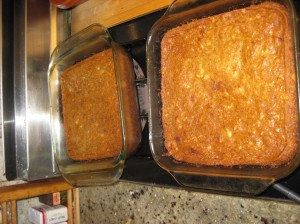
Mash the bananas until there are no big lumps. Mix in the sugar, melted butter, and extract. Sift in the flour, baking soda, salt, and cinnamon. Mix until combined. Pour into a greased or parchment paper lined loaf pan and bake for 1 hour (or, if you’re like me and for some reason can never locate your loaf pan, an 8×8 or 9×9 greased/lined pan will work fine, just shorten the baking time to 45 minutes). This recipe makes one pan/loaf, but I doubled it in hopes that it wouldn’t disappear as quickly.

You’re welcome.

Breakfast Sammies!

2 Apr

Alright, I admit it, I’m a failure at blogging. I used the excuse of school to keep me from posting for all these weeks and now that midterms are this week I am procrastinating by writing this blog. Hopefully it’ll get me back on track! Now I have that out of the way and none of you can make me feel guilty any more. We’ll move on to what all your resentment was really about–not having access to my breakfast sammie recipe. Also, due to the huge gap in posts I had time to take a copious amount of pictures to better suit your sammie making process.

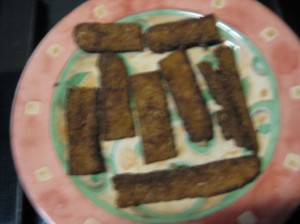
Again, this recipe was inspired by overpriced food from Sticky Fingers Bakery (Now of Cupcake Wars fame) during my visit to D.C.  In the prepared food section there they had a breakfast sandwich that consisted of a nutritional yeast spread, tomato, tempeh bacon, and tofu egg on a bagel. It cost like five bucks, and tasted good. I thought, this would be such a great thing to have in the fridge. You could just make a handful at the beginning of the week and grab one whenever you knew you’d be out long enough to need a meal. So I did, and they rock. Even my little sister, the ultimate judge due to her pickyness and irritating habit of not lying to me when my food doesn’t meet her standards, likes them! It takes a little while to make them, but the result is protein filled sandwich meals ready whenever you need them.

I use Vegan Brunch for my tofu egg and “nooch” spread recipe. I love Vegan Brunch. Initially I shied away from it because I wasn’t a big brunch person, but after buying it that problem was quickly solved as I was instantly converted to brunch personhood. It’s full of mouth watering recipes and it’s super dependable. It also serves as a great reference for crazy awesome brunches which I’ve started doing for just about any reason. Vegan Brunch has a tempeh bacon recipe but while I was at the Co Op I decided to just buy tempeh bacon, because I can. I didn’t do exact calculations, but I thought that maybe the extra price would even out if I factored in the liquid smoke I would need to buy to make tempeh bacon. Nevertheless, tempeh bacon recipes are easy to find, or you can cheat like me. Lastly, I really want these to be affordable. I live a block away from an awesome bagel shop, so I use the bagels from there which are 90 cents a piece, which is pretty pricy, but they’re crazy delicious. You could save money by buying bagels from the grocery store, but my best recommendation is to never buy bagels. Ever. Bagel shops, like any other bakery, always make more than they sell. So at the end of every day they fill a trash bag up with bagels and usually just leave it next to the dumpster. Let me make clear what this is–free fresh bagels. They’re not even a day old! No one should ever pay for bagels, instead harvest the waste of our excessive capitalist society.

On to the ingredients!

Tofu Egg (this is just a small version of the omelette recipe in Vegan Brunch. So if you feel like omelette double it and fill it up with something delicious, like mushrooms and spinach or marinated asparagus):

1 clove of garlic

1/2 lbs silken tofu (not mori-nu), nasoya recommended due to its water content.

1 tbsp nutritional yeast

1 tbsp olive oil

1/2 tsp turmeric

1/2 tsp salt

1/4 cup chickpea flour

1 1/2 tsp arrowroot powder (for more on the magic of arrowroot powder see my Pasta Carbonara post)

“Nooch” spread

1 cup vegetable broth

1/4 cup all purpose flour

2 garlic cloves, minced

a pinch of dried thyme, salt, pepper, and turmeric (for those that don’t know, a pinch is roughly 1/8 tsp)

1/4 & 2 tbsp nutritional yeast

1 1/2 tsp fresh lemon juice

1 tsp mustard

Also needed:

Bagels

Tempeh Bacon

Tomatoes

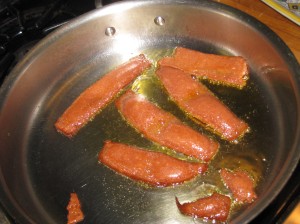
I know you’re all super brilliant, but I’ll just mention that you should adjust all your ingredients based on the amount of sammies you plan on making. The recipe I’m presenting makes around 4-6 sammies, most of the rationing is dependant upon how much tempeh bacon you want to allot to each sandwich. If I’m feeling generous I do 1 1/2 strips of tempeh bacon per sandwich. I just cook my tempeh all together in my nonstick pan before or after I do the egg. I trust you are all capable of ad-libbing cooking tempeh bacon.
Egg! As I mentioned in the ingredient list, this egg is adapted from Isa’s recipe for omelette, so feel free to tuck it into your repertoire of awesome breakfast recipes as it is quite versatile. For this I use my awesome immersion blender (which is awesome) but can also be done in a normal blender or food processor/prep. Blend/process the garlic, tofu, nutritional yeast, olive oil, turmeric, and salt until smooth. Add chickpea flour and arrowroot and puree until combined.
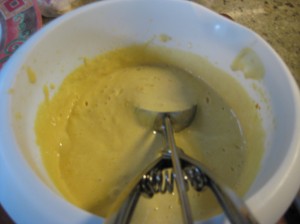
To cook I use my Scanpan (the best purchase I made as a Sur La Table employee, I highly recommend checking them out) and my trigger ice cream scoop. If not using a nonstick pan, spray or cover with a thin layer of oil and scoop an ice cream scoop worth (about a 1/3 cup) onto the pan once hot.
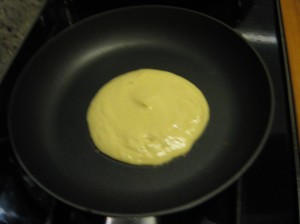
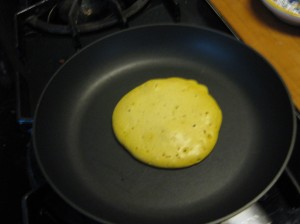
When the top has turned a matte yellow give it a flip. Takes around 8 minutes per egg, depending on how much heat is applied.
Next–the nooch! This sandwich basically emulates a bacon, egg, and cheese (with tomato), so the nutritional yeast spread is supposed to serve as the cheese. The recipe is kind of tricky since it’s intended to be more of a gravy like sauce, but I manipulate it into being a spread. I do this by halving everything in the recipe except the thickener (the flour) and mixing the flour into the broth when it’s piping hot (very important!). When I mix the flour in when the broth isn’t hot enough it doesn’t ever thicken like it should and I’m forced to start over. That being said, step one: combine broth and flour.
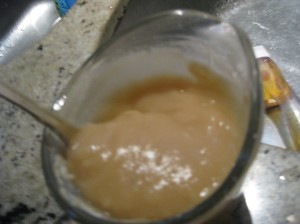
In a small saucepan saute oil and garlic and cook over medium low heat for around two minutes being careful not to burn the garlic. Once nicely browned and fragrant and a pinch of all listed herbs and let cook for another quarter minute. Add broth mixture, turmeric, and nutritional yeast and turn heat up to medium. Cook stirring frequently with a whisk or fork, it should start bubbling in around three minutes, if not, add more heat.
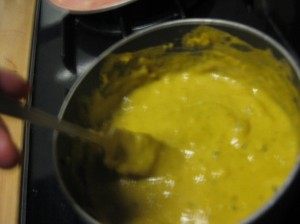
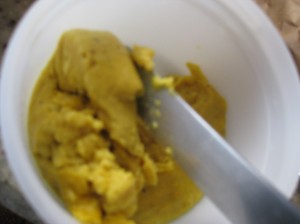
After sauce has been bubbling for around two minutes add lemon juice and mustard, take off the heat. I usually let it cool a bit and transfer to a container that I refrigerate. If you did it right, here’s what it should look like when cooled and ready for spreading:
Lastly, take a tomato and slice it into 1/4-1/2 inch slices. If using a big tomato, one slice per sammie will do. If you only have cherry tomatoes on hand, one sliced cherry tomato per sammie is my usual ratio.

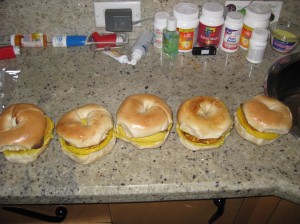
Congratulations, you’ve made all the constituent parts of your breakfast sammie! All you have left to do is assemble it! This is super easy: spread nooch on both sides of bagel, top with egg, bacon, and tomato, and then again with bagel! I even took awesome photos to assist you:
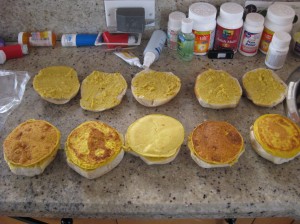
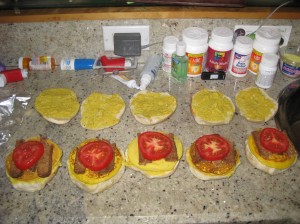
Rock out to lots of fanfare in your head ’cause now you have all these delicious sammies to eat! Go you! I usually wrap them individually in plastic wrap or aluminum foil. They last in the fridge for a week, but if using fresh bagels the bagels become very chewy with time.
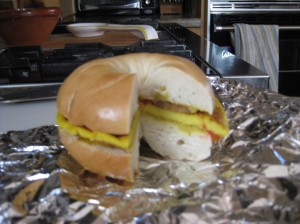
Totally awesome!

Birthday Focaccia

14 Feb

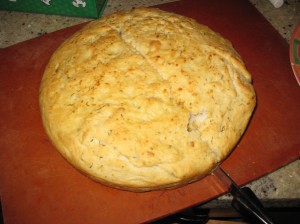
It was my dad’s birthday on Thursday, and being the great daughter that I am I cooked his birthday dinner. We had spaghetti (a shared favorite), but I wanted to add something special, so I decided to make an herbed bread and it turned out to be crazy delicious and easy. I got the recipe from The Joy of Vegan Baking, which never lets me down.

I know I’ve already raved about stand mixers, but I’m going to do it again–the bread hook. I wouldn’t say I love making bread by hand, but I certainly like it, however it can be so messy and frustrating, and no one wants to deal with that. The bread hook on my stand mixer is one of the coolest inventions ever, you just dump in your flour, salt, and yeast mixture and it kneads it into a ball! It’s a win-win, you feel much more connected to the bread than you would had you bought it or used a bread machine, but you save the crusty hands.

Ingredients:

1 packet active dry yeast

1/2 cup warm water

1 tsp granulated sugar

3 1/2 cups all purpose flour

2 tsp salt

2-3 tbsp herbs

3 cloves minced garlic (optional)

1 cup water

5 tbsp olive oil (divided)

2 tsp coarse salt

Dissolve the yeast in the warm water with the sugar. Set it aside for ten minutes (if it doesn’t start to bubble after five minutes, it may be inactive, restart with a fresh packet).

My yeast got really awesome and bubbly so I took a picture.

Mix your herbs together in a little prep bowl. The recipe suggests using fresh rosemary leaves, but I don’t really like rosemary, so I used mostly garlic powder (preface: I initially set out to make find a garlic roll recipe, so I had garlic on the mind). I also used some fresh oregano, ’cause I had it on hand. I added my minced garlic to the prep bowl.

Dump the flour, the salt (not the coarse salt), the herbs with garlic, and 2 tablespoons of the olive oil into a bowl and mix to combine. Add the yeast and knead (hopefully using your bread hook) until you have a smooth and elastic dough ball, adding water as needed (I ended up using a little more than a cup of water).

Stick the dough in a bowl coated with olive oil, cover it with a damp cloth, and stick it in a warm place to rise until it’s doubled in size. A great tip my aunt gave me for this was while you’re kneading preheat your oven to 200 degrees and turn it off after ten minutes, then you can stick your dough in the oven to rise. It works magically.

It should double in size in 2-2 1/2 hours. Punch it down and knead for a few minutes. Press into an oiled 9 or 10 inch round cake pan. Cover the pan again and let it rise for another hour. Preheat the oven to 400. Uncover the pan brush with remaining olive oil and sprinkle with coarse salt. Bake for 20 to 25 minutes.

The leftover bread was stored in a gallon ziploc bag, and it still tasted great 2 days later! It’s a real winner and is super easy as long as you get it started early.

Destination: Diana (Adventure Post #1)

14 Feb

As an avid reader of this blog (as I’m sure you all are)  you’re well acquainted with my best girl Diana, she’s my best vegan friend and I freaking love her for it. We love each other and food and the two of us together was a match made by Seitan. We’re both avid Quarry Girl readers and are constantly saving up to knock items off our bucket list. This week’s item? Doomie’s Home Cookin’
Doomie’s Home Cookin’ is pretty much the greatest thing that’s ever happened to me. It’s a total hole in the wall that’s super hard to find, but it’s menu includes pot roast, fried chicken, pulled pork sandwiches, and fettucini alfredo. It is out of this world.

I hate going to vegan restaurants and ordering things I easily could’ve made myself for a fraction of the price (ahem, Golden Mean Cafe). I love the food I make, but no matter my labors, I don’t think I could ever create anything of equal caliber to Doomie’s fried chicken. It’s just not possible. Forget about any health conscious vegan ideal you’ve ever held, and settle into a world of mouth watering mashed potatoes and deep fried oreos. In addition to Doomie’s out of control menu, they have a pastry chef that must be a magician–it should be illegal for food to be this good.

This was my second visit to Doomie’s, so I was able to compare and contrast it for consistency. On my first trip I ordered the fettucini alfredo, which was unbelievably saucy and came with a garlic roll that was extraordinary, however for breakfast I had had leftover pasta carbonara, two consecutive meals of creamy pasta resulted in Doomie’s being somewhat overshadowed. Diana had the pulled pork sandwich, which was huge and included a side of mac n cheese (all for like 8$, it’s very reasonably priced). For desert we had the apple tartlet which was quite possibly the most delicious thing ever to reach my mouth. Our waiter was cute and super helpful, and the chef even came out to talk about which of the desert items had nuts, and altered our dish slightly to avoid my allergies.

On our second visit on Saturday I had the fried chicken with mashed potatoes (you have to request the gravy–it’s extraordinary), a roll, and mac n cheese (which I had them trade for the offered side of soup or salad).

The chicken achieved a level of crispy I had never known possible, it was greasy and even somehow seemed to have dark and white “meat” in it. The mashed potatoes were perfect, and I especially enjoyed eating the fried chicken dipped in potatoes. The Mac n Cheese was more soupy than creamy, but still delicious and more fresh feeling than the heavier items. The roll was exactly what you expected to go with the meal, perfect for sopping up any leftover juices. All in all it was a perfect ten. My only criticism would be that afterwards I felt more full than I ever had in my life, and I didn’t have any room to try desert.

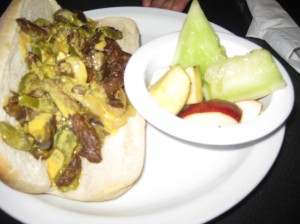
Diana had the Philly cheesteak with fruit, and was satisfied.

The picture probably doesn’t do it justice. The biggest difference between our two trips to Doomie’s, on the latest excursion our favorite waiter wasn’t working. It took at least ten minutes for the waitress to notice us (at which point she pretended we’d “snuck by” her, however during our wait we were certain she was pointedly avoiding us). After our order was taken she was obviously frazzled with the delivery of our food and check. Nevertheless, I can not wait to get back.

Strawberry Shortcake

9 Feb

This is strawberry shortcake, and it rocks. The recipe is from Vegan Cupcakes Take Over the World, but it’s hidden among many suggested variations. Isa also has a strawberry shortcake in Vegan With a Vengeance, but it’s a totally different recipe and the creme part is made from macadamia nuts, which make my throat swell shut (one day you’ll all get the low down on the plight of a vegan with nut allergies, but not today). Devin and Caiti, my vegan sensei’s, came over for dinner on Saturday, so I decided to knock their socks off with these.

Ingredients:

Strawberries:

3-4 cups strawberries sliced thin

1/2 cup maple syrup

Cupcakes:

1 cup soy milk

1 tsp apple cider vinegar

1 1/4 cups flour

2 tbsp cornstarch

3/4 tsp baking powder

1/2 tsp baking soda

1/2 tsp salt

1/3 cup canola oil

3/4 cup sugar

2 1/4 tsp vanilla extract

Creme:

1/2 cup vegetable shortening

1/2 cup earth balance butter

3 1/2 cups powdered sugar

1/4 cup soy milk

1 1/2 tsp vanilla extract

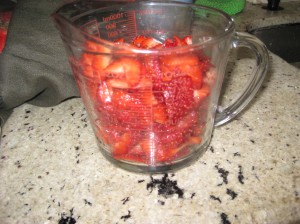
Start with the strawberries. Thinly slice all your strawberries and throw them into a container that gives you room to stir them, and add the maple syrup. The sugar in the maple syrup is going to draw the water out of the strawberries so you’ll get this great maple-strawberry syrup, and the strawberries taste like candy. It’s pretty fantastic. I prepare strawberries like this when I make chocolate chip pancakes as well, it’s super great. That being said, you may not need the full 3 or 4 cups of strawberries, but I tend to eat at least half a cup worth, so it’s good to be prepared.

Now on to the cupcake! I’m sorry to say, this isn’t a shortcake at all. Just a normal vanilla cupcake. But it doesn’t matter because this is still crazy delicious and the vanilla cupcake does it’s job of posing as shortcake beautifully. Preheat the oven to 350 and line your cupcake pan. Add the apple cider vinegar to the soy milk (for those of you who don’t know, the vinegar curdles the milk making the closest replica of buttermilk), leave for a few minutes to curdle. In a medium bowl beat the sugar, oil, extract, and curdled milk. Sift in the cornstarch, flour, baking soda, baking powder, and salt. Mix ’til minimal lumps, but being sure not to over mix is more important than any leftover lumps.

I like to use big cupcake liners that stand up on their own without needing a cupcake pan. They’re big, so you make less, but they’re more like the shnazzy gourmet cupcakes everyone loves so dearly, they’re especially handy for this recipe, because the assembly of the shortcake involves cutting a cone out of the cake and filling it, additionally I like to add strawberries around the top so the big wrappers allow me extra room. They’re just a good call!

Fill your wrappers about halfway and stick them in the oven immediately! I’m super bad about this and I never have my cupcake liners ready and I always risk getting cupcakes that don’t rise properly because the chemical reactions start happening right when that batter gets mixed and if you don’t pop them in a hot place toot sweet you’ll be stuck with flat cupcake patties, a mere shell of what you knew they had the potential to be. Set your timer for 18 minutes-ish.

While the cupcakes cook work on your icing. This can be done using a handheld mixer or a stand mixer, but I always dread the day where I’ll attempt this with a whisk. I used to only own a handheld mixer and making this icing really felt like a chore (even though it was soooo worth it), so when my handheld mixer broke and I went to borrow my neighbors stand mixer I was shocked with how easy this is. Moral of the story: if you have neighbors that own a stand mixer, but never bake, take my advice and borrow it indefinitely.

Now, with your newly acquired stand mixer mix the butter and shortening. Once butter and shortening are fully incorporated, add the powdered sugar on a low speed (otherwise it’ll fly everywhere). Beat until you have something that somewhat resembled powdered sugar gravel. Add milk and extract, and beat for at least 7 minutes AND I’M SUPER SERIOUS ABOUT THIS. My strategy is to beat until you think you’re done and then beat for two minutes more. It has to get lots of air incorporated so it gets all awesome and fluffy. Once it’s done scoop it into a gallon ziploc bag (I tried doing it with my piping tube, but I think I had added too much sugar [which is fine, but the more sugar the stiffer and less malleable the icing] so I ended up siphoning it back into a series of sandwich bags because we were all out of gallon bags. Don’t be like me, always have gallon bags!) and hang out until your cupcakes have come out of the oven and totally cooled.

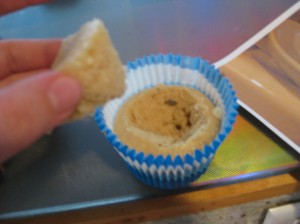
Now is the super fun part! Once your cupcakes are totally cool (AND I MEAN COOL!) take a spoon or knife and cut, at an angle, a circle in the middle of the cupcake. You don’t want to penetrate the bottom of the cupcake (I bet right now you’ll start wishing you had cool self standing cupcake wrappers that give you tons of room to do this).

Once the cone’s out fill the well you just made with strawberries.

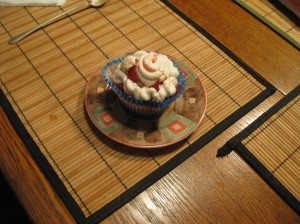
Cut a corner of your ziploc and cover the strawberry well with a dollop of icing. Now stick the cone back on the strawberry well, applying a little pressure so it’ll stay in place. Next I add more strawberries around the perimeter of the cake cone, then cover the perimeter strawberries and the cone part with more big swirls of icing. Top it with some drips of strawberry juice from the bottom of your maple strawberry container, I just drip it with a spoon. You can eat them right then and there, but they’re best refrigerated.

Footnote: I know this is an inopportune time to post this since strawberry season isn’t really anywhere in sight for most of the world, but in the glorious Santa Monica Farmers Market world, the strawberry season just ended, so I was celebrating the end of the almost year round berry harvest. My advice would be to just print this out and tape it to your window so you can dream of the summer day when this’ll rock your world. Or move to Southern California.

Pasta Carbonara

5 Feb

Today my bestest girl Diana (who also made a guest appearance in the first post) came over and after pouring over cookbooks for a few hours, I decided I should impress her with my pasta carbonara, so that’s exactly what I did.

Carbonara is a creamy bacon sauce you serve over pasta. I found this recipe on vegan yum yum years ago while I was missing creamy pasta sauce and it more than hit the spot–who says creamy bacon sauce is off limits to ethical eaters?! Since then it’s been a weekly staple for any night where I want plenty of food in minimal time. This is the typical dish I make when I get back from concerts late at night and I’m really hungry but my feet hurt like hell, because it pulls together in no time. I assume at one point it had precise measurements, but that was before I forgot them, nevertheless, I’ll do my best to convey it to you!

Ingredients:

Salted water for boiling pasta

A box-ish of pasta

2 cups soy milk, or whatever you use

2 tbsp arrowroot powder

2 tbsp oil, canola or vegetable oil works fine

5 strips of vegan bacon, I use Smart Bacon

1/4 cup white wine

4 tbsp earth balance butter

3 tbsp nutritional yeast

(Now I’m going to make up spice measurements that I never actually measure)

1 tsp garlic powder

3/4 tsp kosher salt

1/2 tsp black pepper

1/4 tsp red pepper flakes

1 tbsp of dried parsley (fresh works too, use more than a tbsp)

First thing’s first, fill up your pasta pot with water and get it on the blazing stove. The key to getting the dish together fast is getting the water boiling in the first ten minutes. As far as pasta for this goes, any pasta will work. I really like to do a combination of pasta with like a 3/4 linguine to 1/4 fun small pasta ratio, but really you can throw whatever half empty boxes you have in your pantry. The amount of pasta you want to use will be directly proportional to the amount of creamy sauce you like. The sauce to pasta ratio decreases at the pasta increases. That said, I usually use around 3/4 lbs to 1 lbs of pasta.

Throw a big pan on with some oil and your bacon strips. In a box of Smart Bacon I get enough bacon to make three pans of carbonara, the first two with five strips of bacon and the last with four. Flip your bacon as you see fit, but don’t worry about it too much, this is mostly about getting the bacon flavor into the oil.

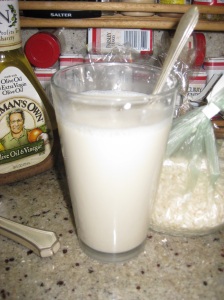
Next, whisk your arrowroot powder into your milk. Arrowroot powder is the bomb, it’s like cornstarch, except you’re supposed to add it to the liquid you want thickened while the liquid is cold, but it leaves a taste that is far superior to cornstarch. I also use arrowroot powder as my thickener for ice cream, but that’s for a different post! Once whisked in, set it to the side.

Deglaze the pan with the white wine. I used to think this step was vital, but I actually forgot to do it tonight, and it tasted exactly the same, so leave it out if you like. If you do deglaze, do it when the bacon is halfway cooked. Also, when you pour the wine in DO IT FROM A DISTANCE. THIS IS REALLY IMPORTANT. It will sputter like crazy immediately, get your hand the fuck out of there!

Once the bacon’s cooked (7-10 minutes after you started cooking it, depending on the heat. I trust you know how to cook veggie bacon) take it out and throw it on your chopping board. I usually spend about fifteen seconds with each bacon strip and my spatula trying to shake off the excess oil YOU REALLY WANT TO SAVE ALL THAT BACON OIL. IT’S THE WHOLE POINT. Once all the bacon’s out, drop in your butter. When that’s basically melted dump in your nutritional yeast and whisk it in.

Before you dump the arrowroot milk, give it a whisk as the arrowroot will have somewhat settled at the bottom, then pour it in. Whisk until combined.

At this point my water is usually boiling. Make sure there’s at least a tablespoon of salt in the pot before you add the water! Dump in your pasta and make sure you know what time it is and what time it’ll be in 10 minutes.

Chop up your bacon into little pieces and add it to the carbonara. Whisk in the spices. Stir the pasta so it doesn’t stick.

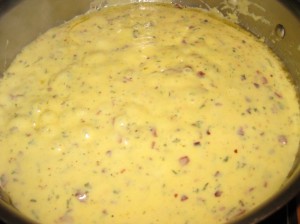
When the carbonara sauce is bubbling steadily, it’s usually about ready. I like to use it as carrot dip to judge whether it is properly spiced and at my desired consistency. Once you like where the sauce is at turn the heat down and give it a stir occasionally while you wait for your pasta to cook. After about eight minutes of cooking, scoop out some pasta, run it under cold water and taste it to see if it’s cooked.

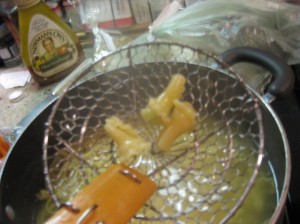
Last step! Don’t drain your pasta! Use a cool netted spoon, like the one seen in the above picture, to scoop out your pasta and dump it into your carbonara pan. The pasta water is awesome and starchy and adds flavor to the sauce, so don’t worry if you’ve got a steady drizzle coming from your net spoon (I can not remember what the technical term for this utensil is, my Sur La Table managers would be ashamed). Mix the pasta and the sauce and let it sit for a few minutes (if you can’t wait don’t sweat it, scoop that up and dump it in a bowl). To be eaten with a side of raw carrots.

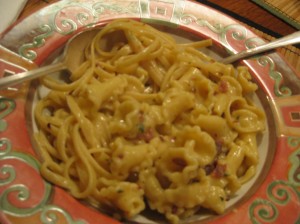
Diana was impressed. She even modeled what it’s like to eat!

Marshmallow Madness

4 Feb

My dad’s out of town right now so I’m taking care of my sister. Dad likes to give me a hard time about him not being able to leave us alone without us killing each other, so we like to prove him wrong by getting along. That being said, today I managed to subsist on leftovers, but toward the end of the day I figured I whip up something sweet for Kara.

I was in D.C. over Christmas and did my best to spend as much time at Sticky Fingers as possible where I encountered chocolate covered Dandies marshmallows on a stick being sold for 3$. I realized anyone could easily recreate them at home for a very small fraction of the price, and being that Dandies has (finally!) made its way to the Santa Monica Co-op, I decided I’d give it a try.

Simple stuff. I stuck three marshmallows on a toothpick leaving about an inch for a handle. Melted a cup of chocolate chips in the microwave and used a spoon to help cover the marshmallows. After dipping I sprinkled rice crispies on all sides (I wanted to do crushed graham cracker, but couldn’t find any. However, it was later agreed that the puffed rice was a superior choice) and laid them out on aluminum foil to harden.

My main tip would be a little chocolate goes a long way with these, try to keep the coating as light as possible while still being all encompassing.

I made ten, seven of which Kara devoured in a matter of hours. I asked her to help me think of a name for them and her best one was Marshmallow Madness, which won because it was more catchy than my title of ‘Crispy Chocolate Marshmallow Sticks’, but you can just call them delicious.

Soup Series #1: French Onion Soup

3 Feb

Discuss television with me for any short period of time and you will quickly learn that I watch the Food Network almost exclusively. I somewhat expected this habit to change with my vegan diet, but it didn’t. The Food Network and I are entangled in a love/hate relationship, I can’t stand most of the personalities, I’m constantly shocked that they have no vegetarian shows, but, for some reason, I continue to tune in. Well, my time with the Food Network has finally paid off with Ten Dollar Dinners.

Melissa D’Arabian, winner of The Next Food Network Star, is the host of Ten Dollar Dinners in which she claims “4 people, 10 dollars, infinite possibilities.” Perhaps due to the cost efficient nature of the show, I have more than once seen ways to easily veganize her recipes, and that is what I present to you today! During this winter my goal is one soup per week, hence this being part of a series.

I will say that this soup should be reserved for the French Onion Soup enthusiasts, because it’s incredibly rich. My dad managed to inhale two full bowls of it, but I had trouble finishing one, I was somewhat overwhelmed by the flavor. That being said, it seems in this case a little would’ve gone a long way, however, growing up learning to cook I was always cooking for a family, and myself being an adamant leftover lover, I only know how to cook in bulk, so I doubled the recipe.

Ingredients:

4 tbsp Earth Balance Butter

3 1/2 lbs onions, or 8 yellow onions (I used a variety of onions, you can use whichever you have around, or are cheapest)

Salt and pepper

2 tbsp flour

1 cup vegan red wine

2 tsp lemon juice (I used orange, it worked fine)

2 tbsp of fresh thyme (I didn’t have any fresh thyme, I used a combination of fresh parsley and dill, with dried thyme)

2 bay leaves

8 cups of stock (I used a combination of Imagine Creamy Portobello, and Better Than Bullion No-Chicken and Vegetable base)

1 loaf of crusty bread to serve with

First thing’s first, cut up those onions. I use onions goggles. There. It’s out there for the whole world to see, I have really sensitive eyes and I cut onions every day and onions goggles were a spectacular investment for me, even if my little sister makes fun of me all the time for ’em. They really work! That being said, I used a variety of onions which I found at the Farmers Market (the single greatest thing about southern california is year round farmers markets), and the result was awesome, but I’m sure any onion would do.

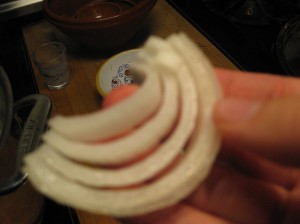
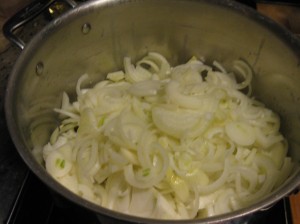
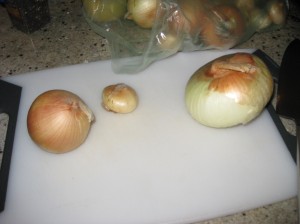
Melissa claims it’s very important that you cut them “with the grain” so that they hold their shape, however after an hour and a half of caramalizing, they resemble onion noodles more than anything. Nevertheless, I included a picture of what a thinly “with the grain” sliced onion is. While slicing melt the butter over medium-low heat, and throw all your onions in with some salt and pepper.

Now, cover it and go read the paper. I’m serious! The onions need to caramelize for 1 1/2 hours! No joke. I check on them every half hour or so, and more frequently toward the end to make sure everything’s going well, so take this time to clean up and work on a side dish (I did my shittake quinoa green beans as the side, but those are a signature dish of mine, so I’m saving them for their own post), or catch up on Democracy Now! or whatever you do.

After an hour and a half have passed you will have a pot full of something that you can kind of tell was once onions. Add the flour, stir it in and let it cook for a minute or two, then deglaze the pan with the red wine. It’ll now look like a red slurry of onions, I tried to take a picture but the steam kept it from turning out. Next, add all the spices. Melissa likes to press the importance of fresh thyme, but I didn’t have any so I used parsley and dill, I also added garlic powder and some red pepper flakes, cause I add that to everything.

Lastly, add all the stock. I did one cup of Imagine’s Creamy Portobello Soup, three cups of Better Than Bullion Vegetable base, and four cups of Better Than Bullion No-Chicken base. I’m sure the combination of soups is not key to the dish, but Melissa emphasized the use of half chicken stock and half beef stock, so I figured I’d throw in what I could.

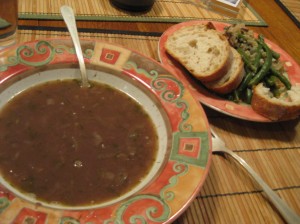
The greatest thing about this is, after all the broth is in, just bring it up to a simmer and it’s ready to serve. No sitting around for hours while the flavor integrates–the flavoring was done when you let the onions caramelize, and now it’s time to eat!

The Greatest Chocolate Chip Cookie

7 May

So. This is my first post. My name’s Kendal, I’m seventeen years old, I live in Los Angeles and go to Santa Monica College. I took a test that California has mainly for actors, and it gave me the equivalent of my high school diploma. Since then I’ve been working on a political science major. In my free time I do whatever I want to do when I want to do it, while that sounds wild and crazy it mostly consists of biking, knitting, reading, and eating, but in between all that hell raising I always manage to find time to cook my pants off (literally, I love cooking without pants).

That being said, I am starting a blog because I can.

Well, there’s a little more to it. As a personal mission statement I want this blog to give an insight into the life of a “high school dropout,” leaving school was a really positive thing I did for my life, and I want to show kids that they have opportunities available to them other than wasting away in “mandatory” schooling. I think that there’s something incredibly radical and empowering in living your life exactly as you want it to be without making any sacrifices, and I’m here to show the benefits of that lifestyle to the world with its direct product: lots of time for food. Also, I cook all the time and everyone really enjoys it, I figure why not share all that joy with the internet?

That’s my shpeil and now I don’t have to talk about it again. On to the meat of this article (or to be cutesy, the tempeh), The Greatest Chocolate Chip Cookie.

I am constantly trying to find the best vegan chocolate chip cookie recipe, and I come across all these recipes on the interweb saying “gr8test vegan cookie evrr” and I try them and they’re totally mediocre or they use a cup of earth balance in trying to recreate the toll house feel but instead  you get a dough that tastes like frosting (btw, cookie dough frosting would be the greatest idea ever) and I’m always very let down. Recently my very loving chocolate chip cookie enthusiast father bought me Vegan Cookies Invade Your Cookie Jar. I have been having the greatest time with this book. I had high expectations for the chocolate chip cookie recipe, mostly because I knew everyone else would–screw your fancyshmancy cookies, any critic will want to judge the entire book based off it’s chocolate chip cookie recipe.

I can wholeheatedly tell you that they have exceeded above and beyond any expectations, and are the greatest vegan chocolate chip cookies, or even, greatest chocolate chip cookies, period.

Enough baiting, here’s the ingredients:

1/2 cup brown sugar

1/4 cup white sugar

1 tbsp tapioca flour

1/4 cup soy milk

2/3 cup vegetable oil

2 tsp vanilla extract

1 1/2 cups all purpose flour

1/2 tsp salt

1/2 tsp baking soda

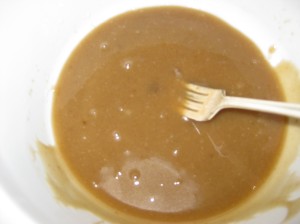
1) Preheat oven to 350. Mix sugars, tapioca flour, soy milk, and oil in a bowl with a fork. Apparently, this sets off some sort of chemical reaction between the oil and the sugar, and it’s really important that you mix it hard for about two minutes until it resembles a dark caramel-y syrup. Then mix in the extract until it’s combined.

2) Add 1 cup of flour, the baking soda, and the salt to the same bowl. This recipe keeps everything in the same bowl, and I use the same fork to do all the mixing, which is nice and convenient. Mix until well combined, mix in the last 1/2 cup of flour.

3) The resulting dough is not typical cookie dough. It tastes alright, but it’s drippy and loose. The recipe says that it makes around 16 3inch cookies, but I’ve had it make 12 and I’ve had it make 18. I would say that the most efficent way would be to use a small trigger ice cream scoop, or a tablespoon to scoop it, but I use my hands (always looking for an excuse to cover myself in cookie dough, some things you never grow out of)

4) Bake for 8 minutes. The recipe says no more then 9 minutes, and it means SRS BZNS. They don’t really look very done, some of them will have barely browned around the edges and once cooled will still have that greasy doughy center, but that’s what makes them awesome.

Here’s two of my pans out of the oven

Here’s one I was eating with some apple juice while writing this post.

And this is my best girl Diana modeling what it’s like to eat one.